

For security reasons, the delivered files expire after 3 days.This means old emails or Slack shares will have broken images and there is not an option to retrieve them. If you want to keep the sent files, it’s best to download them from the alert.
Enabling alerts
Email alerts are available on all Lightdash Cloud plans. To set up Slack, an organization admin will have to add the Slack integration.Creating an alert
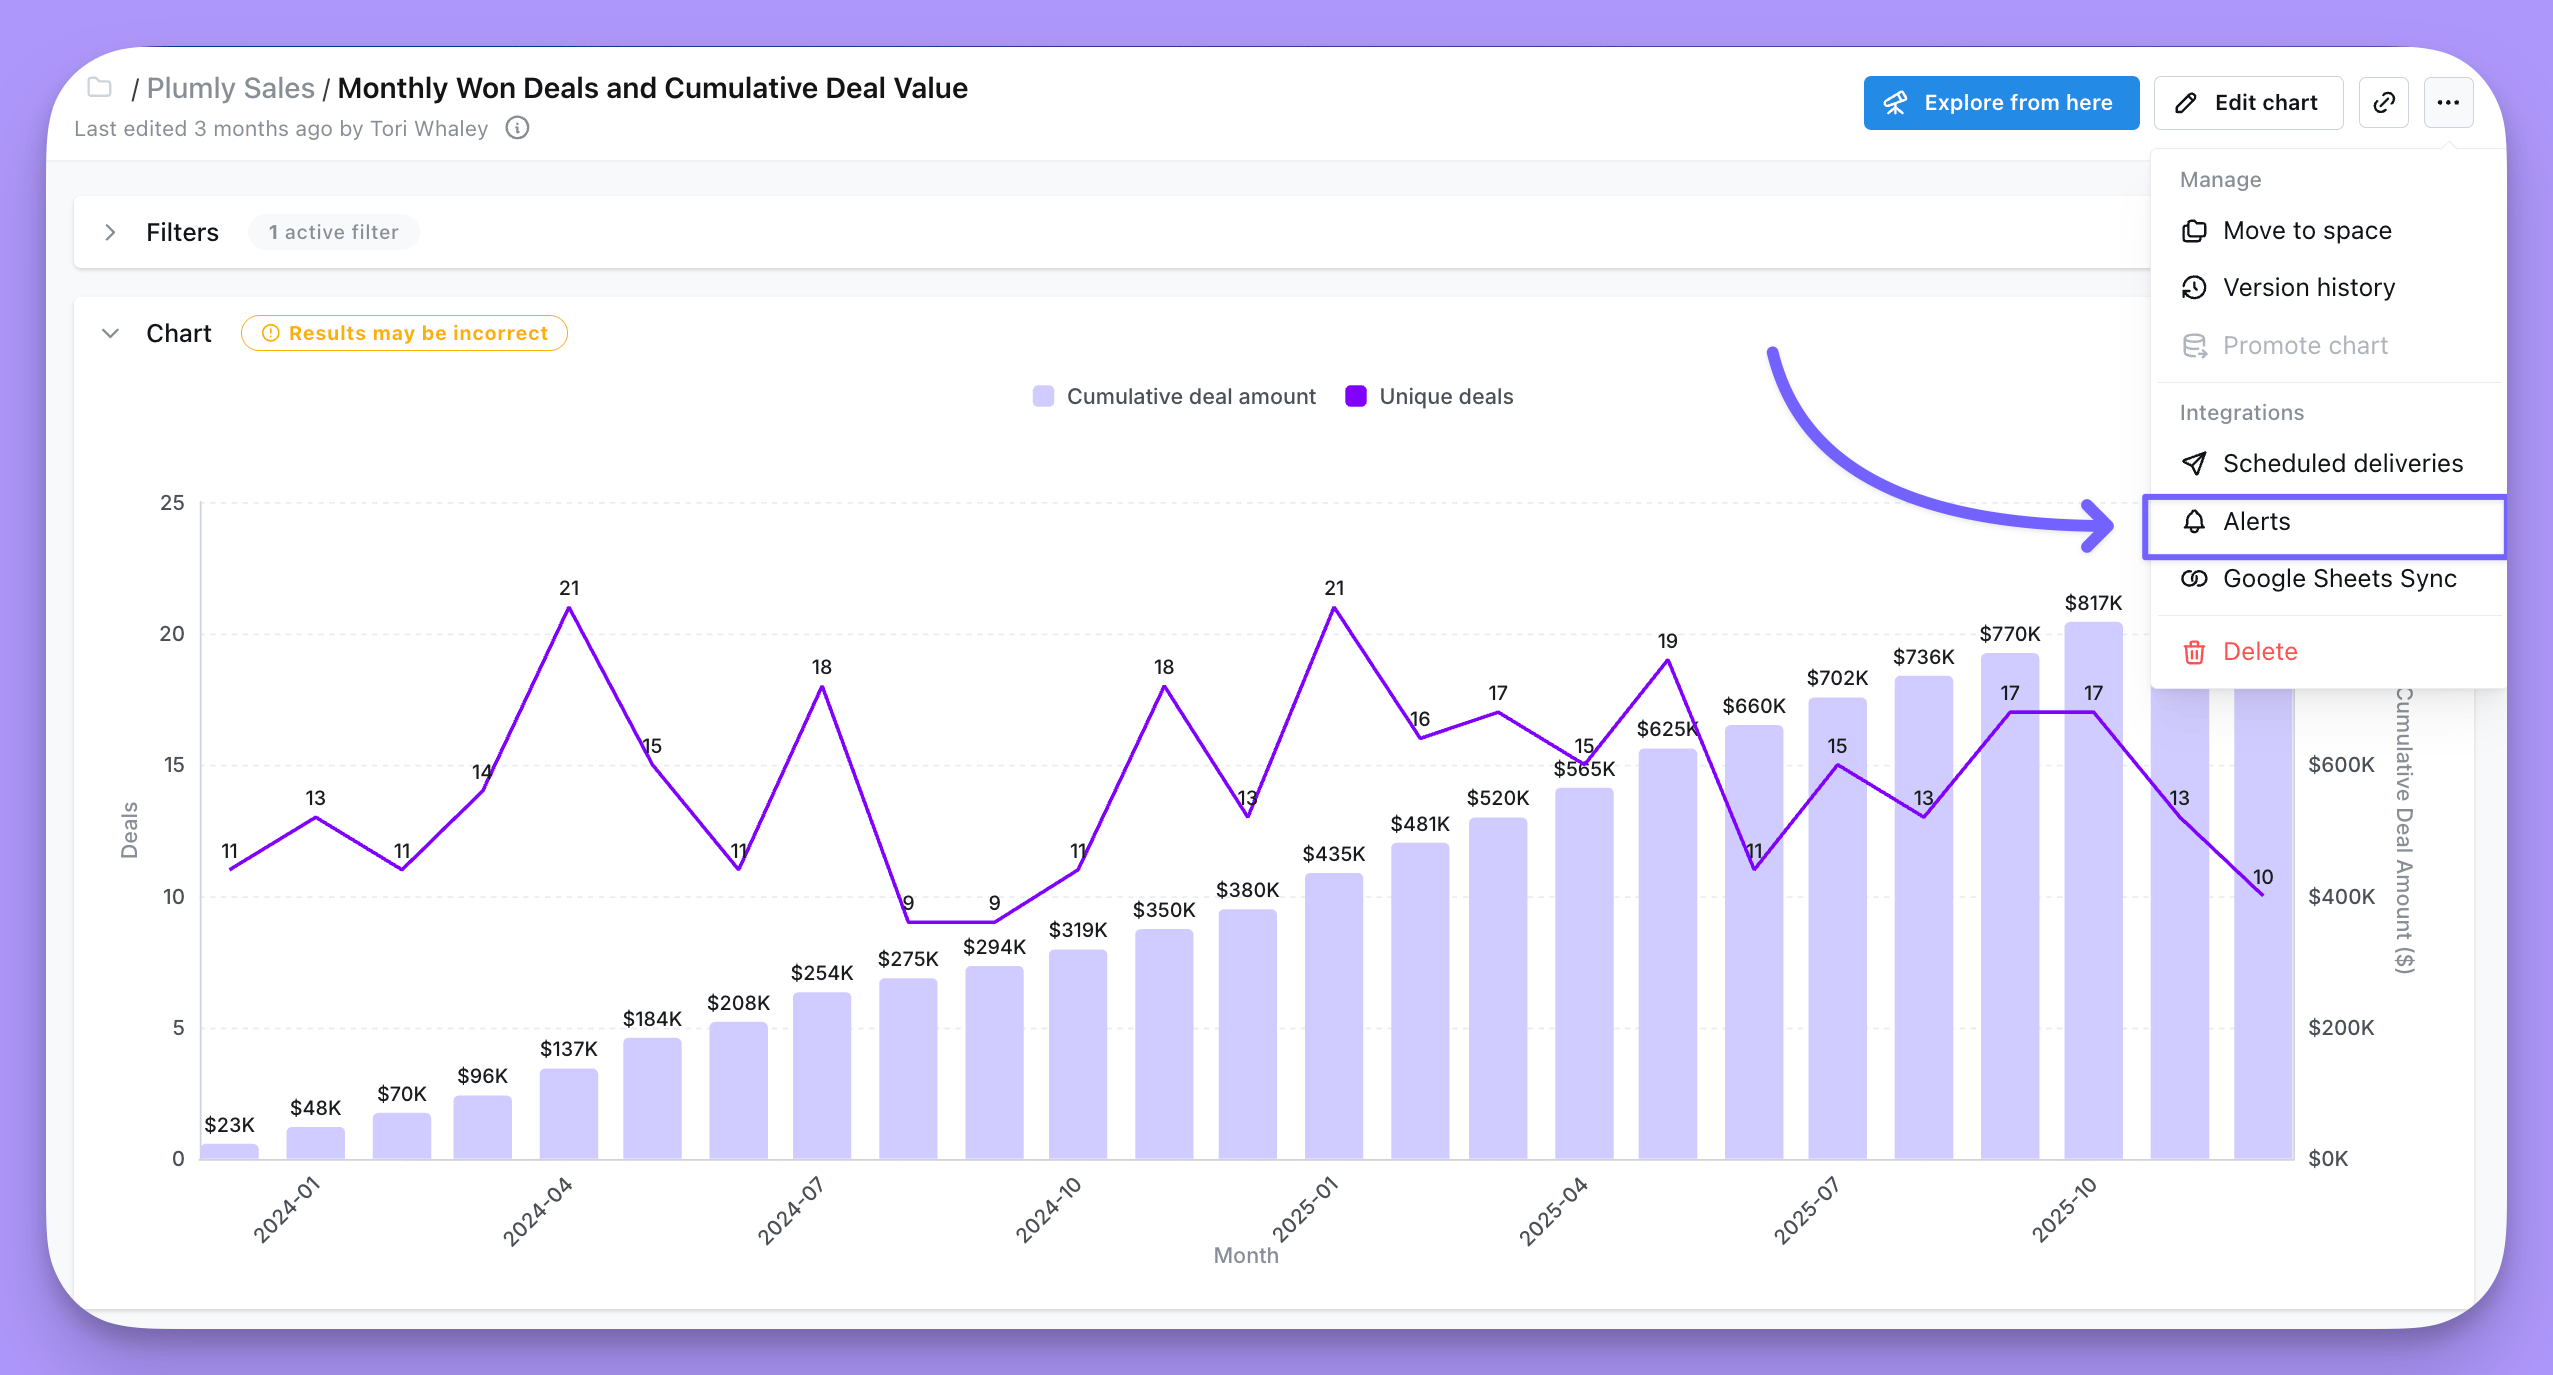
Only users with admin, developer or edit access can create alerts. To create an alert, click on the three-dot menu in the top-right corner of your chart, then click onAlerts.
Create new.
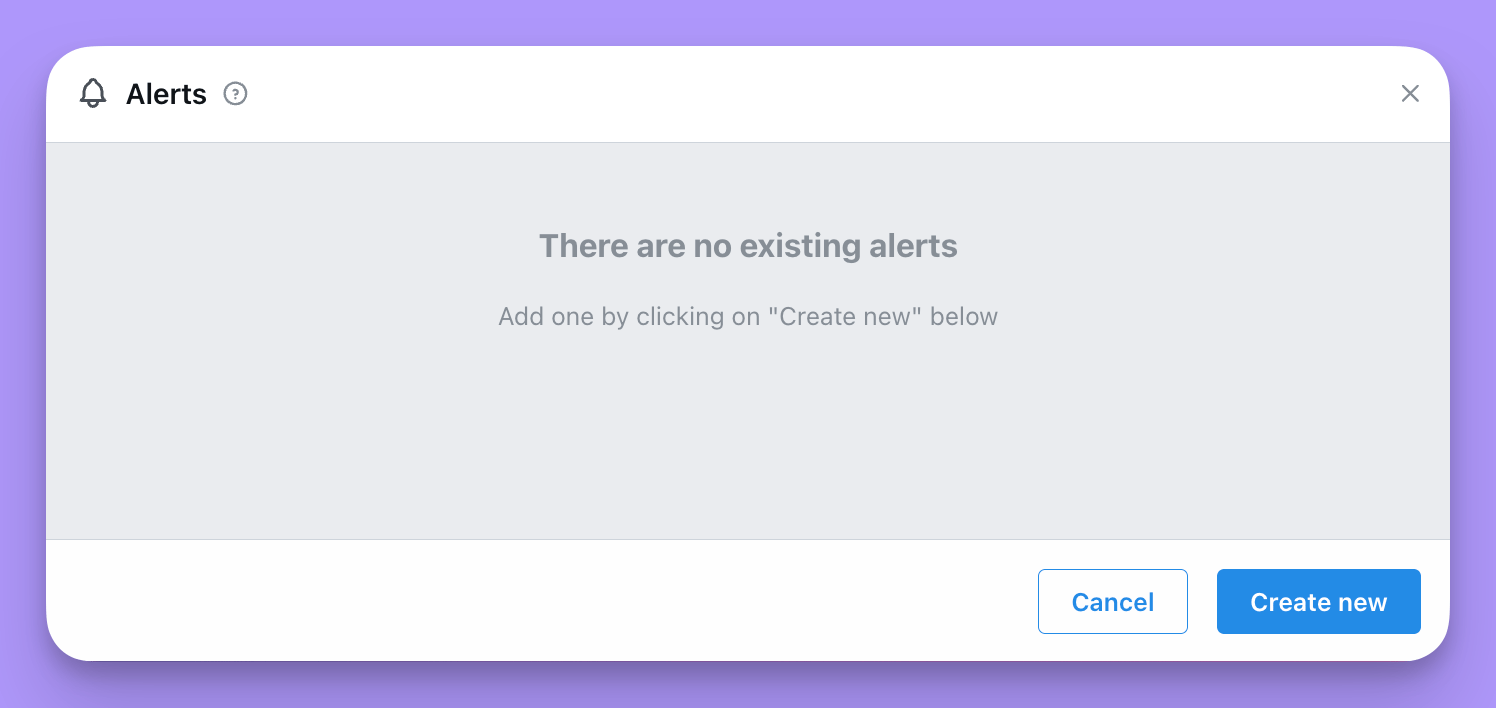
Create new, you’ll be brought to a configuration screen for your new alert.
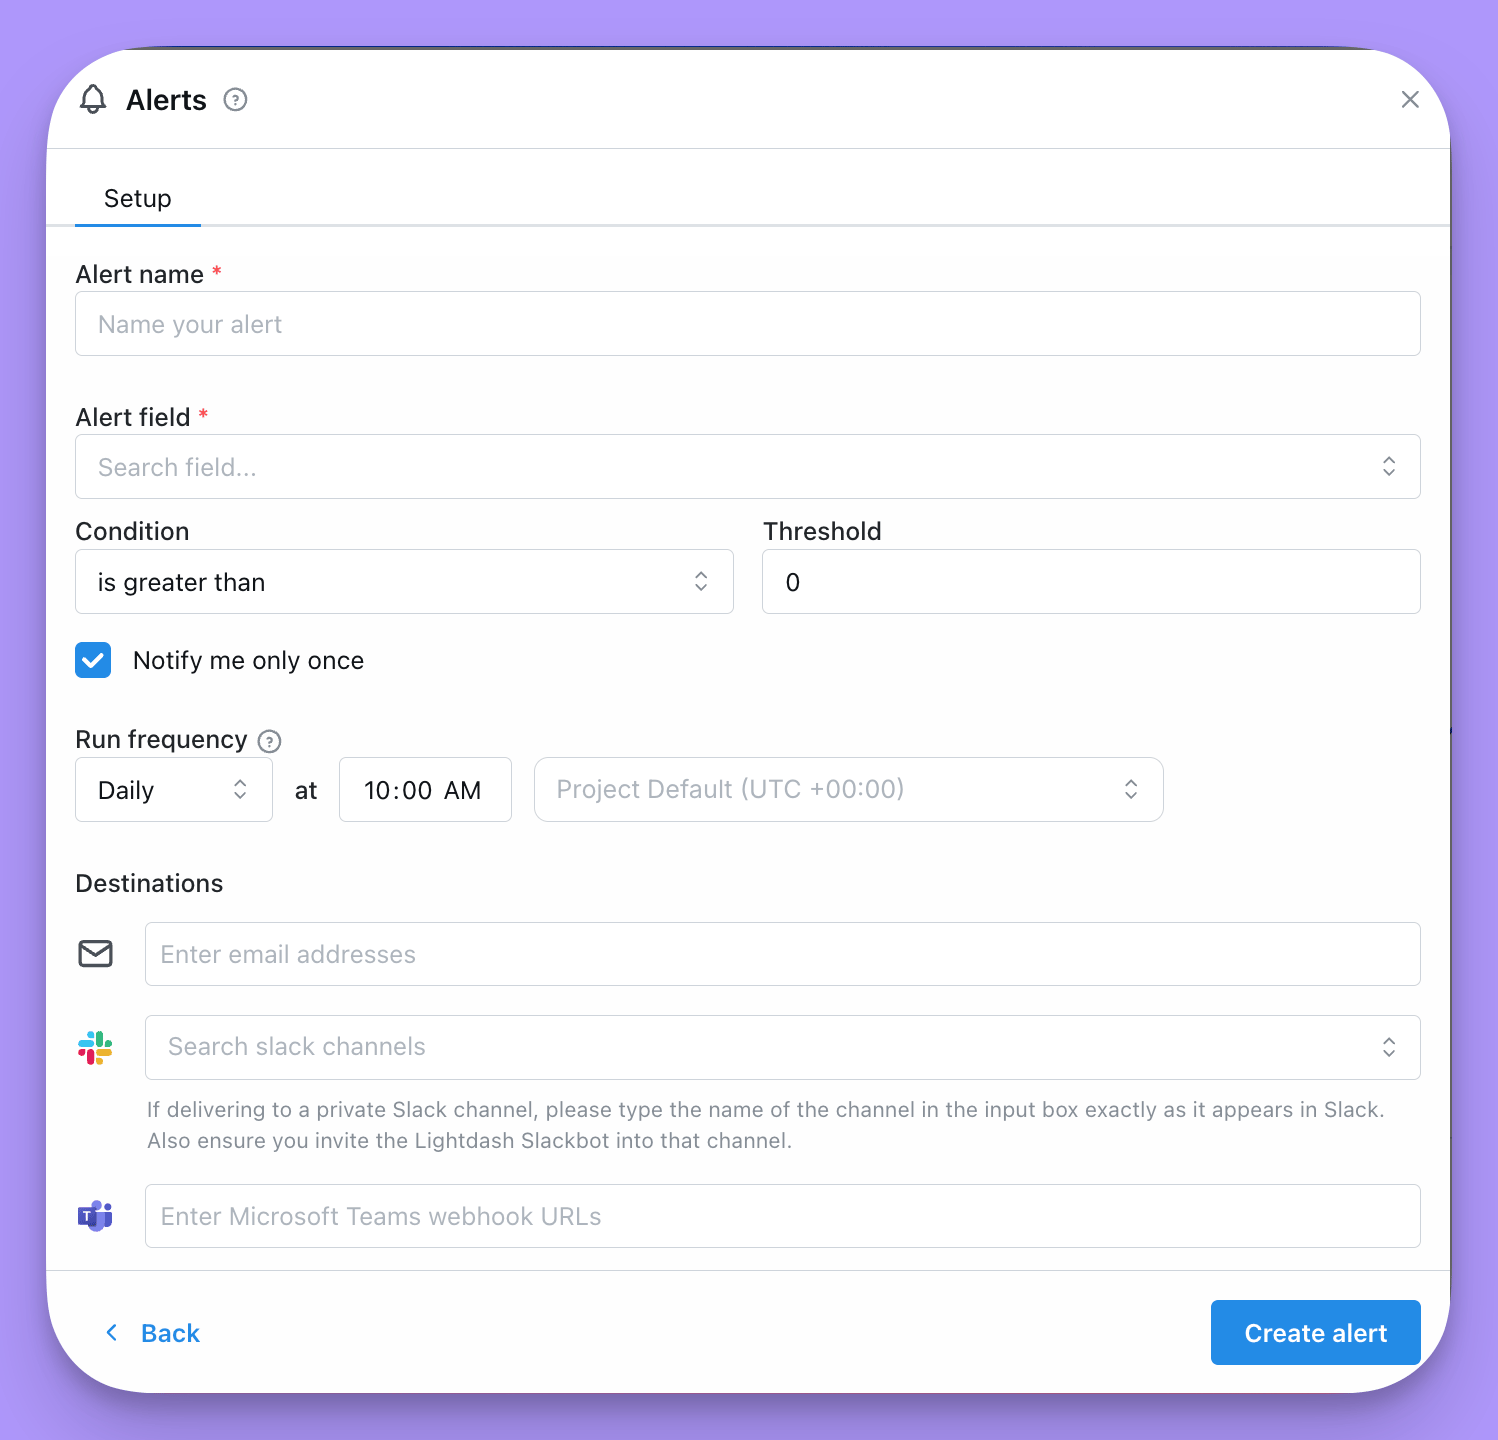
- Alert name: this is the name of your alert.
- Conditions: Configure the condition that is going to be evaluated against the first result(s).
Alert fieldThe numeric field is going to be evaluatedCondition: Operator we are going to use to evaluate your value.- is greater/less than: Check if the
firstvalue in your results is greater/less than your threshold value. - increased/decreased by: Verify whether the percentage change in the first value relative to the second value exceeds the specified threshold, either by increasing or decreasing.
- is greater/less than: Check if the
- Run frequency: This is the frequency at which Lightdash runs a query to check your data for changes. (You will be notified if the conditions on the latest value are met) . All times for the scheduler are in UTC.
- Send to: here, you can pick if you want to send your alert to Slack, email, or both. You can add as many Slack channels and email addresses as you’d like to here. You can send an alert to a person in Slack using
@persons-nameor to a channel using#channel-name.
Editing and deleting your alerts
To edit an alert, click on the pencil-icon next to the alert you want to edit. This will bring you back to the configuration screen for your alert, where you can make any changes you’d like. In case you want to delete a alert, click on the trash-icon next to the alert you want to delete.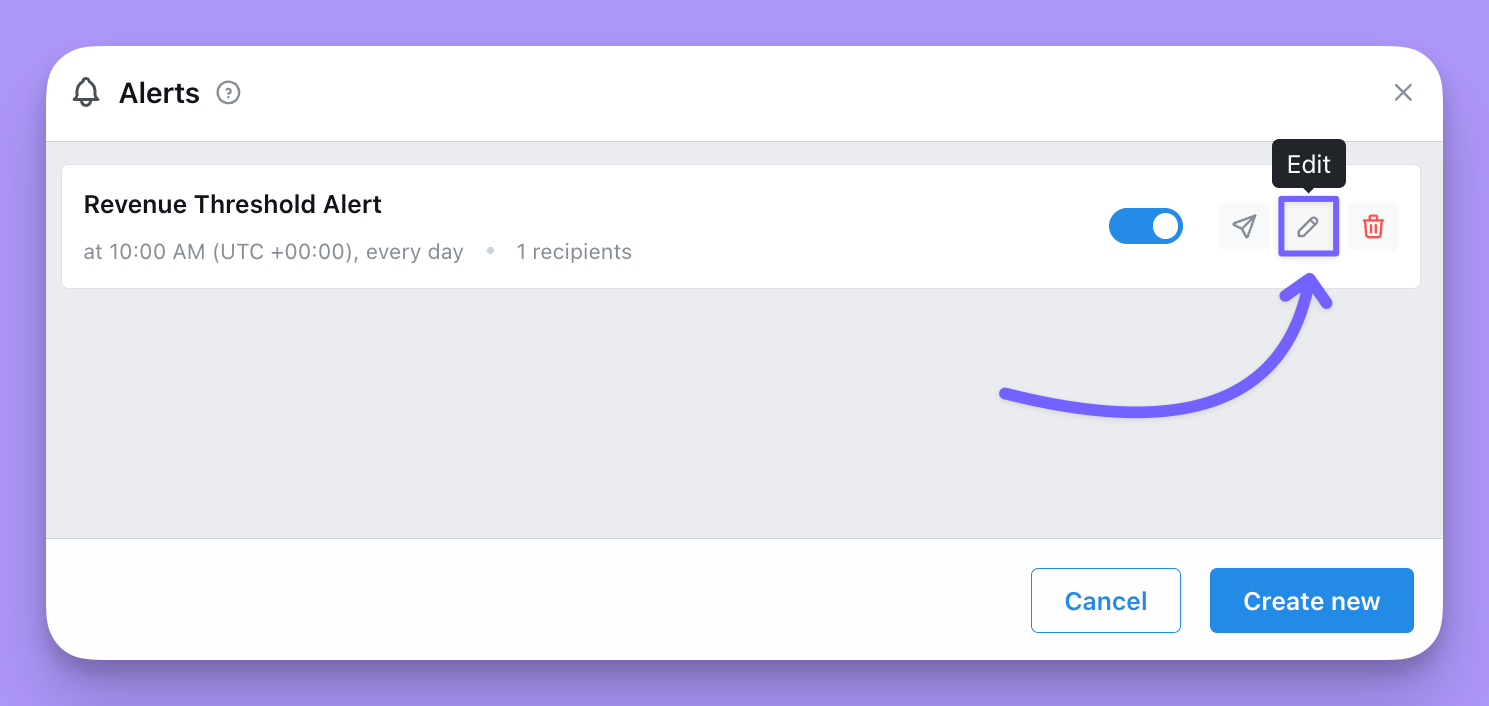
Sending to private Slack channels
You must add the Lightdash Slack bot to a private Slack channel before it can post there.
Sending to Microsoft Teams
You can send Lightdash deliveries directly to Microsoft Teams using incoming webhooks, keeping your team updated with key metrics right inside your Teams channels.Creating a webhook with Power Automate Workflows
- Go to Power Automate
- Select Templates
- Filter by “webhook”
- Select the Post to a channel when a webhook request is received template
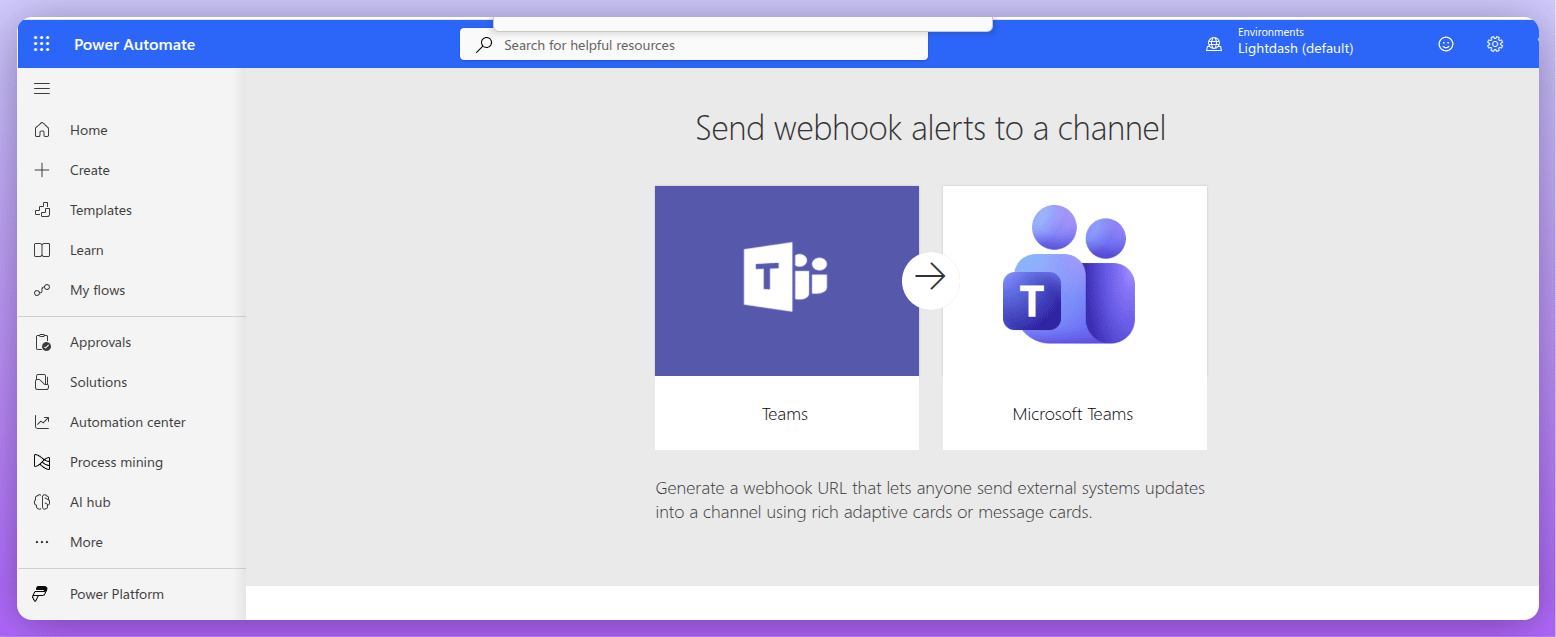
- Select your Microsoft account and target Teams channel
- Once added, click Edit on the workflow
- Select the When a Teams webhook request is received trigger
- Copy the HTTP URL
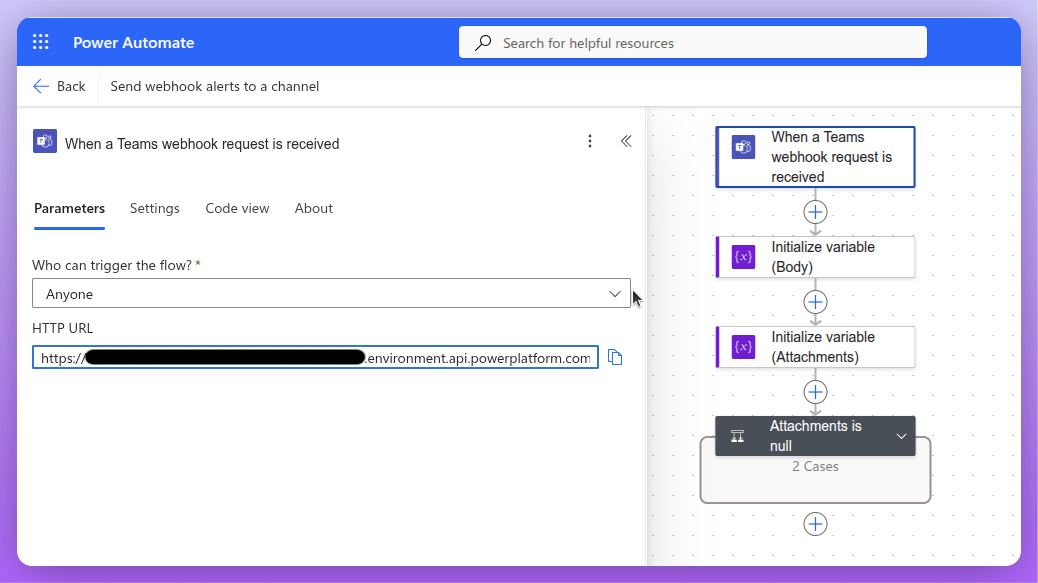
- Use that HTTP URL in the webhook field in Lightdash